Microsoft 365
Any offers an integration with Microsoft 365 that, in particular, shares Any contents in Microsoft Teams, imports contents from SharePoint or OneDrive… This page describes how to configure your Azure to integrate Any with Microsoft 365.
The Outlook add-in, which saves emails and their attachments to Any, does not require this configuration.
Any configuration – Redirect URL
Before configuring Azure, please start your Any instance and go to configuration / General settings / Client options.
Once in this screen (Client options), please copy the value of the Redirect URI field of the "Microsoft -> Enable Microsoft 365 integration" part, as we will need to use it in the next chapter.
Azure configuration – App registration
To be able to integrate Any with Microsoft 365, you must create an application in Azure.
To do so, please go to the "App registration" page reachable here:
https://portal.azure.com/#view/Microsoft_AAD_RegisteredApps/ApplicationsListBlade
Declare a new application
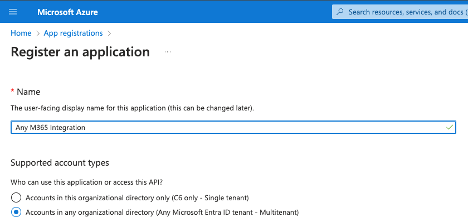
Once on the screen, click New registration.
Enter a name and, in the Supported account type field, select Account in any organizational directory.
Then click the Register button.
Configure the redirect URL
Now go to the Authentication section.
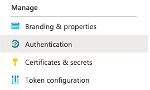
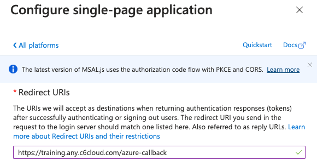
In the Platform configurations part, click the Add a platform button, select Single-page application, and enter the redirect URL copied in the previous chapter (Redirect URL).
Finally, click the Configure button to save the changes.
Generate the secret key
Now go to the Certificates & secrets section.
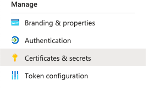
Click New client secret, enter a description and an expiration duration.
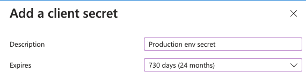
Then copy the secret as it is only displayed once after the creation.
It can no longer be displayed afterwards: so make sure you have saved the secret before leaving the page.
Configure the Azure permissions
Go to the API permissions section.
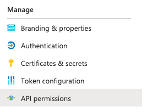
Add the following Microsoft Graph permissions of type Application:
- Channel.Create
- Channel.Delete.All
- Channel.ReadBasic.All
- ChannelSettings.ReadWrite.All
- Files.ReadWrite.All
- Group.ReadWrite.All
- Team.Create
- Team.ReadBasic.All
- TeamMember.ReadWrite.All
- User.Read.All
Add the following Microsoft Graph permissions of type Delegated:
- ChannelMessage.Send
- ChannelSettings.Read.All
- Files.Read.All
- GroupMember.Read.All
- openid
- People.Read
- profile
- Sites.Read.All
- Team.ReadBasic.All
- User.Read
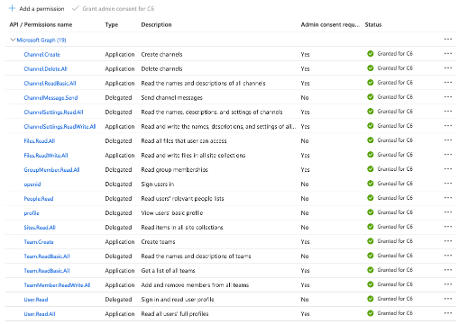
The Group.ReadWrite.All permission is only needed if you want to delete the Teams teams when the content shares are finished.
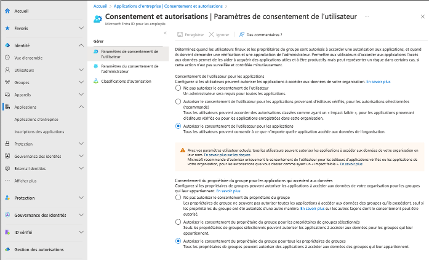
Configure the user consent settings
Now sign in to the Microsoft Entra admin center (https://entra.microsoft.com/) as a Global Administrator.
Go to:
Identity / Applications / Enterprise applications / Consent and permissions / User consent settings
- Under User consent for applications, select: Allow user consent for apps.
- Under Group owner consent for apps accessing data, select: Allow group owner consent for all group owners.
Click Save to save your settings.
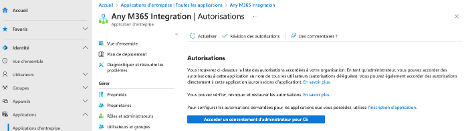
Grant admin consent
Now sign in to the Microsoft Entra admin center (https://entra.microsoft.com/) at least as a Cloud Application Administrator.
Go to:
Identity > Applications > Enterprise applications > All applications
Enter the name of the application in the search box, then select the application in the results.
In the Permissions section, click Grant admin consent for …
Any configuration – Client options
Go back to Any in configuration / General settings / Client options.
Once in this screen (Client options), tick the Enable Microsoft 365 integration option.
Enter:
- the directory ID (Directory ID)
- the application ID (Application ID)
- the secret generated in the Generate the secret key chapter