Metadata transfer
The metadata transfer maps the properties of an Office document (Word content control fields) to the Any metadata: the values entered in Any feed the document. The values entered in Office are not fed back into Any. This page explains how to prepare a Word template for this purpose.
Microsoft Word
Display the Developer Ribbon
To be able to create a content control object, we must first display the Developer tab in Microsoft Word. This tab is not available if you use Office Online.
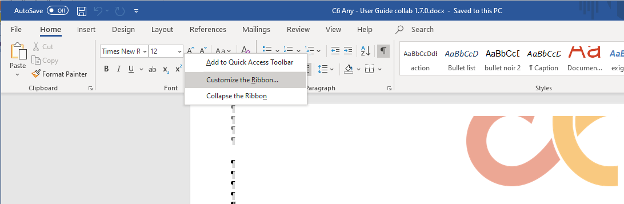
Right-click the toolbar and select "Customize the Ribbon"
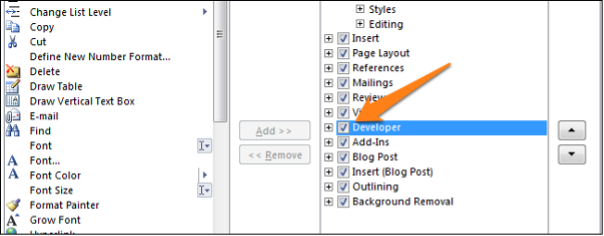
Tick "Developer" and click OK
Content control creation
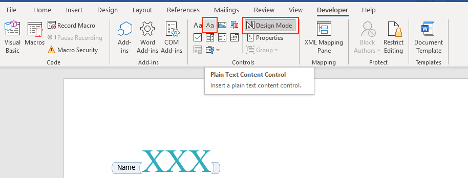
First enable the design mode by clicking "Design Mode" in the developer ribbon, then click the "Plain Text Content Control" button to insert one in the content of the document.
Control properties
Select the field and click the "Properties" button in the developer ribbon.
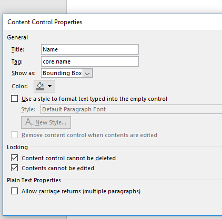
In "Tag", you must put the name of the Any metadata (i.e. 'core.name'). By default, the mapping declared in the aspect is applied. If you want to apply a different formatting or mapping, you can use the following operations:
add(count, 'field_name'), capitalize, concat([separator]), escape, format(pattern), limit(max [, 'ellipsis']), lowercase, mapping(datalist_name, column_key, column_value), minus(count, 'field_name'), regexp('pattern', 'replacement'), replace('pattern', 'replacement'), time(HH:mm:ss), translate([prefix]), uppercase, urlencode.
Template examples:
${core.name}_${core.creation_date | format('yyyy') | lowercase}_${COUNTER | format('00000')}
${standard.authors[0] | uppercase}
Microsoft Excel
Display the Developer Ribbon
To be able to create a content control object, we must first display the Developer tab in Microsoft Excel. Proceed the same way as in the Microsoft Word chapter to add the Developer ribbon.
Content control creation
Select a cell and, in the cell name input box, put the name of the Any metadata (i.e. 'core.name').
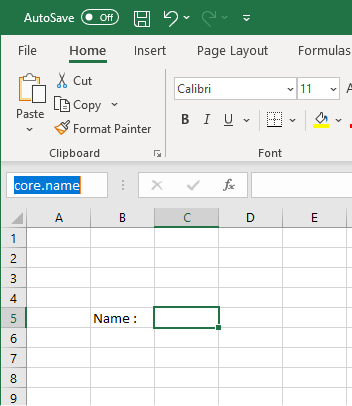
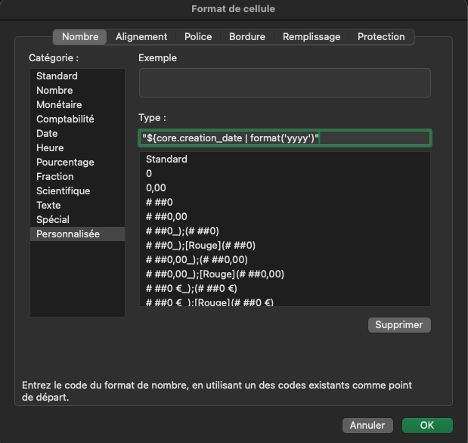
By default, the mapping declared in the aspect is applied. If you want to apply a different formatting or mapping, you must use the "Format Cells" option, then choose "Category: Custom" and enter one of the following operations:
add(count, 'field_name'), capitalize, concat([separator]), escape, format(pattern), limit(max [, 'ellipsis']), lowercase, mapping(datalist_name, column_key, column_value), minus(count, 'field_name'), regexp('pattern', 'replacement'), replace('pattern', 'replacement'), time(HH:mm:ss), translate([prefix]), uppercase, urlencode.
Template examples:
${core.name}_${core.creation_date | format('yyyy') | lowercase}_${COUNTER | format('00000')}
${standard.authors[0] | uppercase}
The entered template must be wrapped in quotes to avoid their interpretation by Excel.