Microsoft Teams Bot
Any can communicate with a Microsoft Teams Bot.
This lets each Teams user of your organization reach some features of Any directly from the Teams client.
This guide describes every step needed to add the Any bot to the Teams app store of your organization.
App registrations
- Click the link: https://portal.azure.com/#view/Microsoft_AAD_RegisteredApps/ApplicationsListBlade
- Click the "New registration" button
- Register a name and click the "Register" button.
- Copy the application (client) ID.
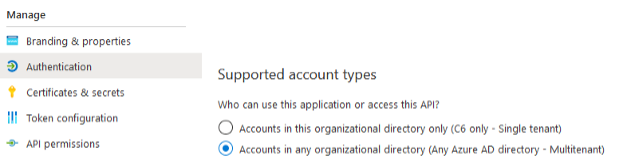
- Click "Authentication" in your application and tick the same options as in the screenshot below, and save.
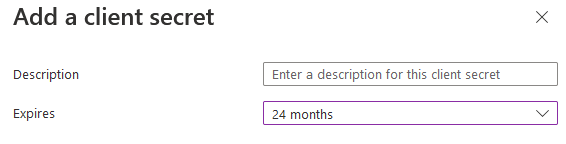
- Click "Certificates & secrets", then next to "New client secret", enter a description and an expiration delay.
- Copy the client secret value now as it can no longer be displayed afterwards. It is only displayed after the creation. Make sure you save the secret at its creation before leaving the page.
- In "API permissions", add the Graph permission "User.ReadBasic.All".
Bot creation
You must now create the Bot that uses the dedicated endpoint on Any.
- Create a new Bot Services on your Azure portal.
- Enter a "display name for your Bot".
- Tick "Use Existing app registration".
- Copy the old "Application ID" into "App ID" and add your App Tenant ID.
- Finish the creation of the Bot.
- Once your Bot Service is deployed, go to the resource and in Settings → Channels, add Microsoft Teams.
- In Settings → configuration, enter the address of the Bot endpoint:
https://<public url of Any web app>/rest/msbot/messages - Click the "Apply" button.
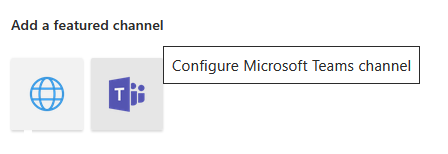
- Click the "Configure the Microsoft Teams channel" button.
- Click the "Save" button after checking the acceptance of the terms of use.
Application generation
On Teams, a Bot must be supplied in a Teams application.
You can create one yourself, but we also provide a convenient way to generate a Teams application descriptor. This way, you only have to import it without having to fill in every field.
- Open your web browser and go to:
https://<public url of Any web app>/rest/msbot/descriptor/<id of your bot> - A ZIP file is downloaded into your download folder.
Deploying the application to the Teams app store
In this step, you upload the ZIP file of the application to the Teams app store of your organization.
More details here: https://docs.microsoft.com/en-us/MicrosoftTeams/manage-apps
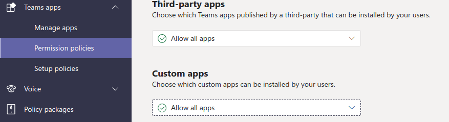
- Check that your app permission policies allow you to use custom apps:
https://admin.teams.microsoft.com/policies/app-permission/
- In "Teams apps", select Manage apps.

- Click Upload, a file dialog box opens. Select the downloaded ZIP.
- A message appears, confirming the success of the upload, and the Any application appears in the list of your applications.
Configuring Any
The last operation is to configure the Any web application.
- Sign in to Any with an account allowed to change the configuration.
- Go to configuration > General settings > Modules > Client.
- Click Enable Teams notifications, then fill in the bot Id and password.
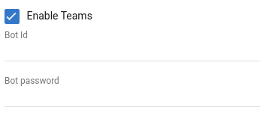
- Save the configuration.
Test the Bot in Teams
- Open your Teams client.
- Search in "Apps" for your new Any application. Please note that there can be a slight delay before your new application is available. Restarting the client can also help.
- Add the Bot to your application.
- Send it a message: the Bot answers you, in your language, with the available commands.